Get started
Connection to the server
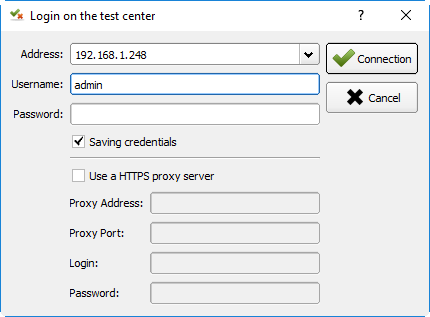
After the oppening of the client, the first step is to connect to the remote server. To do that, you need an account and the remote address of your automation server.
The connection window is available from the Get Started > Connect menu or from the welcome tabulation.
If the connection is successfull, the user can see all remote tests available.
Note
The admin user can be used in the discover of the solution.
Write a test
The first utilization consists to create a very simple testcase and display a parameter.
Create a test of the type
Unit
Add the parameter MON_PARAMETRE of the type
strwith the value “bonjour”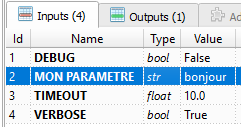
Change the test in the
definitionsection to display the value of the parameter.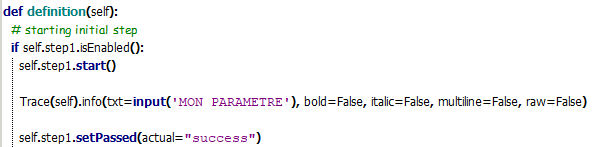
Note
It is possible to check the syntax of the test before execution by clicking on the button
Syntax.
Save the test in the repository with the name “Test_A” in the
Sandboxdirectory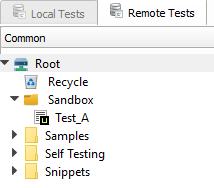
Write a scenario
Note
This mini guide assumes that you have followed the chapter Writing a script test.
The following example explains how to create its first scenario with an overload of test variables.
Create a
Plantype test.
Insert test “Test_A” in the scenario. Click on the
Insert Childbutton and select the Test_A test.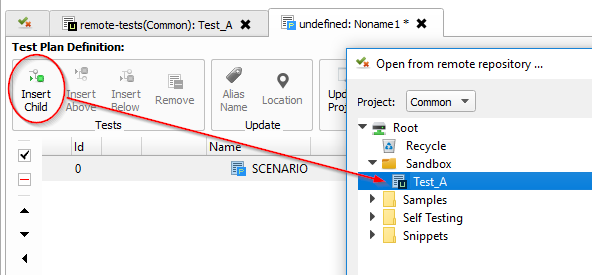
After insertion, click on the Test_A test and insert the same test again.

Save the scenario in the test repository with the name “Scenario_A” in the
Sandboxdirectory.Add the parameter MON_PARAMETRE with the value “goodbye” at the scenario level.
Tip
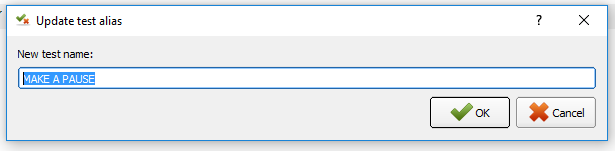
Do not hesitate to define an alias for the name of the test to make the scenario more readable.
Execute a test
Note
This mini guide assumes that you have followed the chapters Writing a script test and Writing a scenario.
You can run a test by clicking the Execute button.
Open the Test_A and Scenario_A tests and run them.

Result analysing
Note
This mini guide assumes that you have followed the chapters Writing a script test and Writing a scenario.
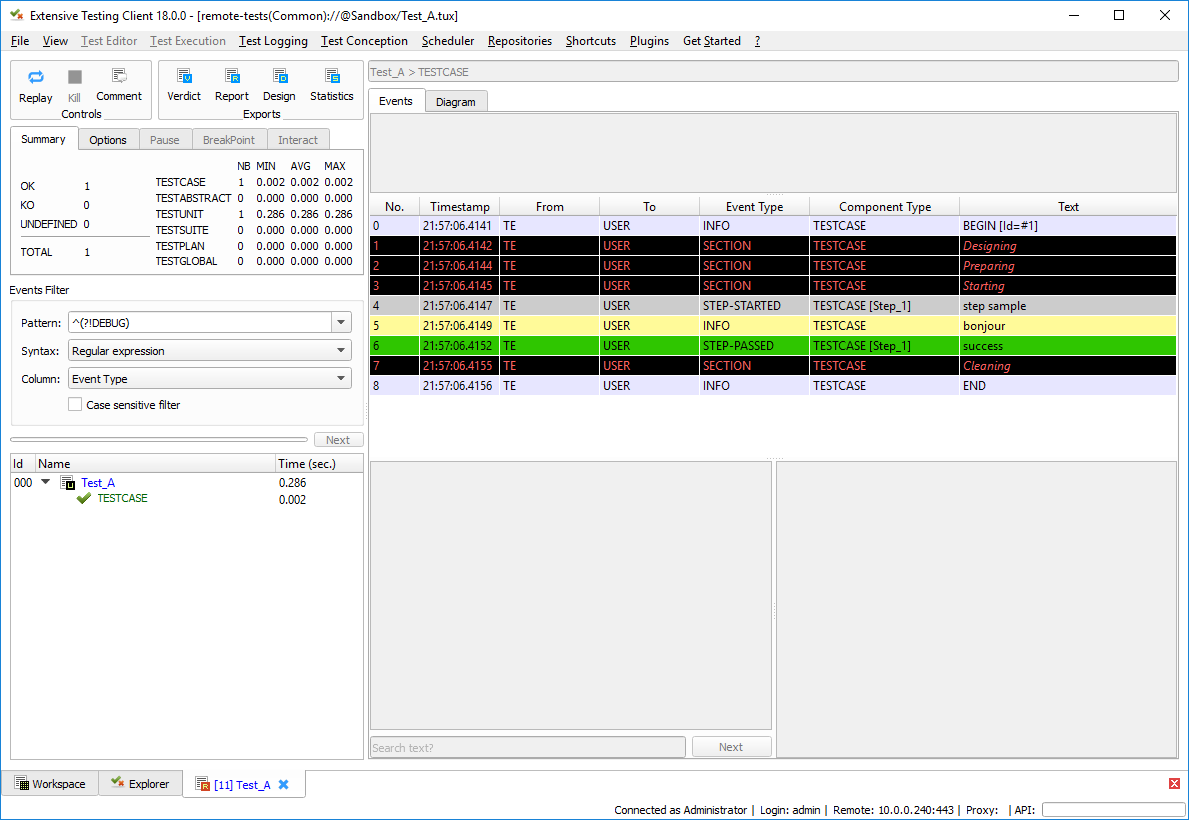
The first analysis window shows the execution of the test “Test_A” and in particular the message “hello”.
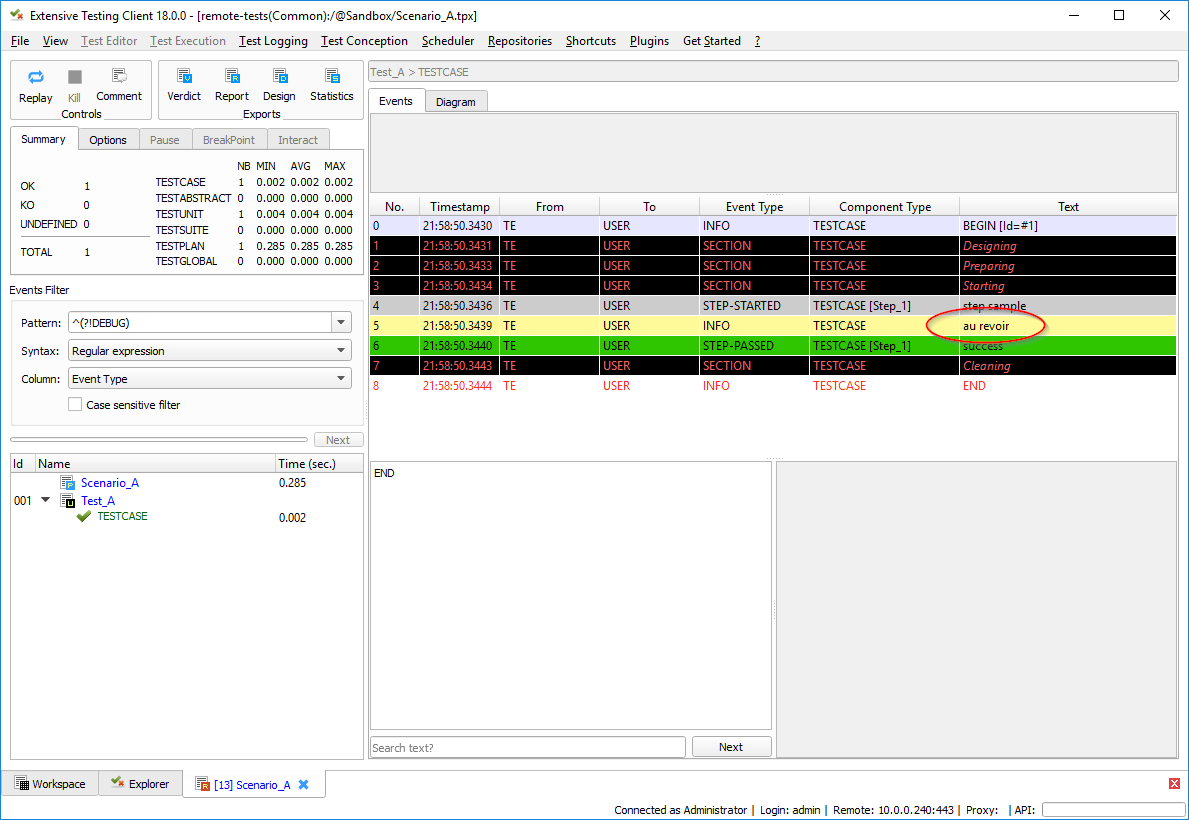
The 2nd analysis window shows the execution of the “Scenario_A” test and in particular the “goodbye” message.
This first usage shows how to run a test and a scenario as well as the overloading of the test variables.
Best practices
Tip
To keep readability in script type tests, do not use try / except. The framework catches all the exceptions at its level.
Tip
- It is essential to take the time to declare the test steps because they allow
- quickly understand the test without the script.
- to have relevant and understandable test reports.
Tip
To facilitate the maintenance of your tests and make them reusable, you should not have hard value in your test. It is necessary to systematically put them in test parameters, it is done for.