Tests examples
Testcase (unit)
This example shows how to use a test case. A test case consists of 4 sections automatically executed by the test framework as well as associated test parameters.

Testcase (suite)
A test suite allows you to run several test cases afterwards. The example shows how to loop on a test case while modifying the incoming data.
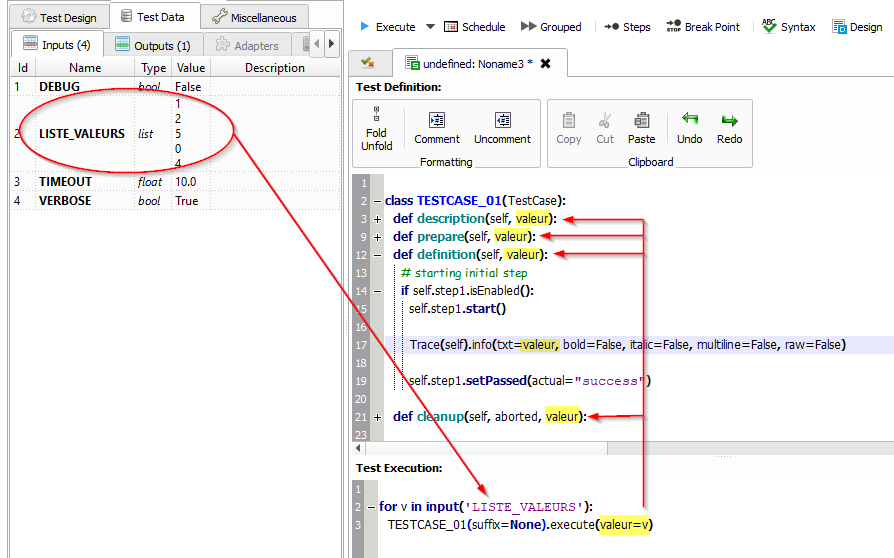
It is therefore possible to add as many arguments as necessary to the execute() function
and add them identically to the level of the 4 sections.
Note
It is possible to add a prefix at the test case level using the prefix argument.
variables
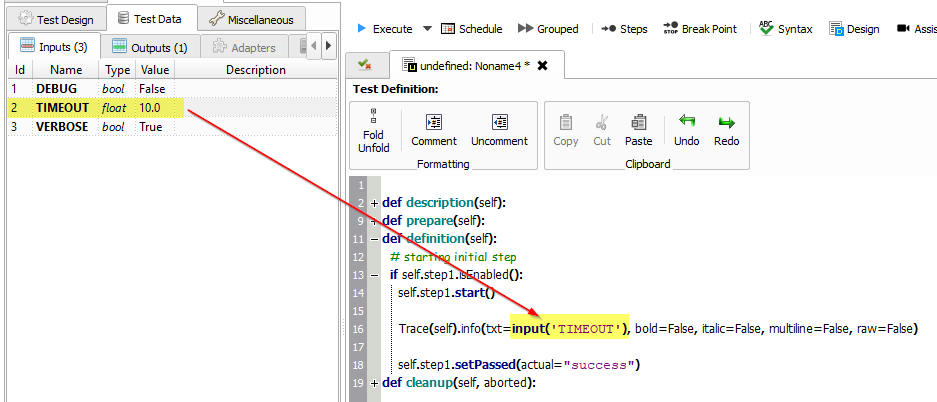
The variables can be used from a test, there are several types. The example below shows how to retrieve a parameter from its test.
A test parameter can be retrieved at the test level using the input function. The name of the parameter to be recovered is to be specified.
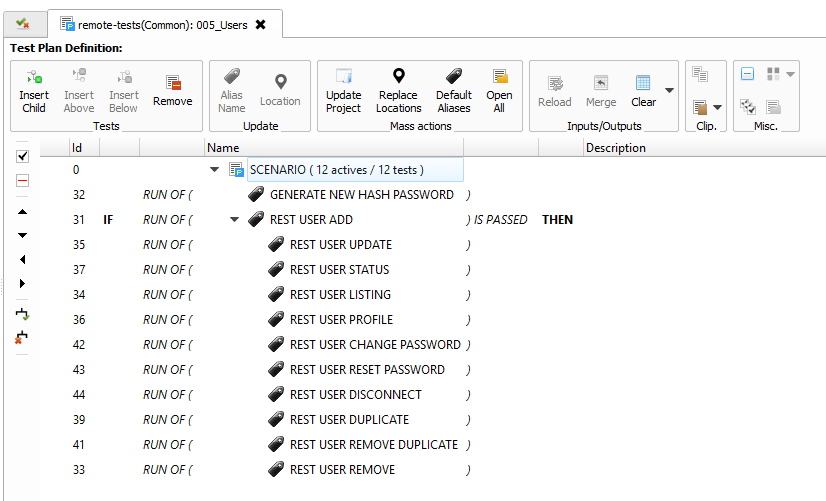
Scenario
A scenario allows you to run several test cases one after the other with result conditions between them. It is possible to override the test parameters at the scenario level.
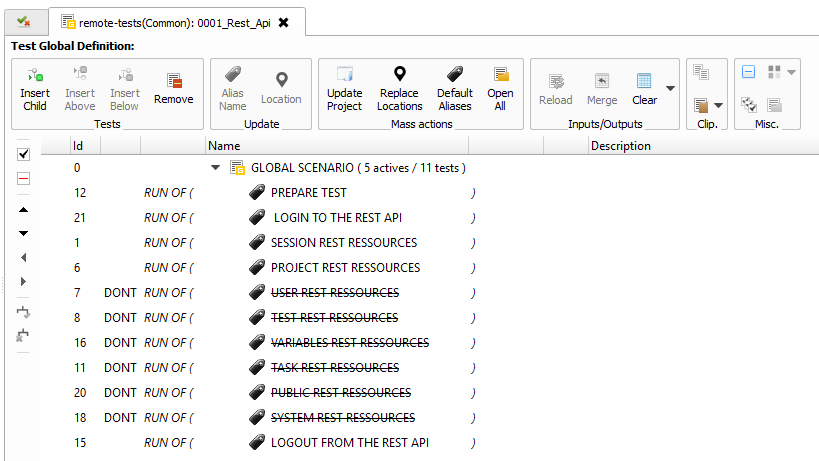
Test campaign
A campaign allows you to run multiple scenarios. It is possible to overload the test parameters at the campaign settings level.
Rest API
- To write a REST API test, it is recommended:
- to use the reusable test
/Snippets/Protocols/04_Send_JSON - describe the target server in JSON (ip / destination port, http support)
- to use the reusable test
Example:
The test calls the httpbin.org service in https and calls the ip service to get the client’s actual ip in json.
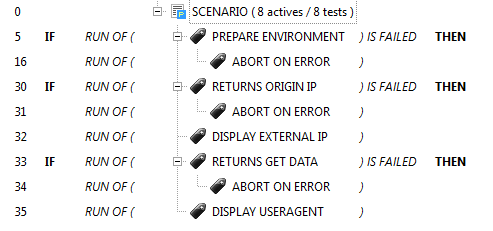
- The scenario breaks down into several stages:
- Preparation of the environment: description of the tested environment (address, network port, etc.) The environment is configured in the ENVIRONMENT parameter of the PREPARE ENVIRONMENT test (Id = 5)
{
 "PLATFORM": {
     "CLUSTER": [
         { "NODE": {
                     "COMMON": {
                         "HOSTNAME": "httpbin"
                     },
                     "INSTANCES": {
                         "HTTP": {
                             "REST": {
                                 "HTTP_DEST_HOST": "httpbin.org",
                                 "HTTP_DEST_PORT": 443,
                                 "HTTP_DEST_SSL": true,
                                 "HTTP_HOSTNAME": "httpbin.org",
                                 "HTTP_AGENT_SUPPORT": false,
                                 "HTTP_AGENT": null
                             }
                         }
                     }
                  }
             }
     ]
 },
 "DATASET": [    ]
 }
2. If the environment preparation does not work then the scenario is stopped by calling the test reusable
Snippets/Do/02_Terminate(Id = 16)3. A REST request is sent and the expected response is described using the reusable test
/Snippets/Protocols/04_Send_JSON(Id = 30). If this step does not work then we cancel the test (Id = 31)The response received is verified by the framework and what was described by the tester in the
HTTP_RSP_BODYparameterorigin [!CAPTURE:EXTERNAL_IP:] The configuration indicates that the response must verify that the `origin` key is present and save the value in the cache with the ``EXTERNAL_IP`` key 4. The value received in the response is displayed with the reusable test ``Snippets/Cache/02_Log_Cache`` (Id = 32)
Note
The example presented below is available in full in the test samples /Samples/Web_API/001_httpbin_rest.tpx.
SSH controls
- To write an SSH test, it is advisable:
- to use the reusable test
/Snippets/Protocols/01_Send_SSH - to describe the target server in JSON (ip, account, password at least)
- to use the reusable test
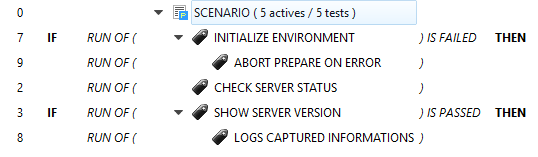
- The test is broken down into several stages:
- Loading the description (ip, account, password) of the target machine into the cache
- Calling the
/Snippets/Protocols/01_Send_SSHgeneric test to retrieve the server version The version (if found on the screen) is saved in the cache with the SERVER_VERSION key If the version is not found, the test goes into error.
# checking server version
xtctl version
.*Server version: [!CAPTURE:SERVER_VERSION:]\n.*
- View the version from the cache.
Note
The complete example is available in the test samples /Self Testing/SYSTEM/000_System.tpx.
Web browsers
- To write a web application test, you must:
- deploy a
seleniumagent on a machine with a firefox, chrome, internet explorer or edge browser - have access to the source code of the web page from his browser
- have knowledge of xpath
- know the basics of HTML
- deploy a
- The recommended approach for writing web tests is as follows:
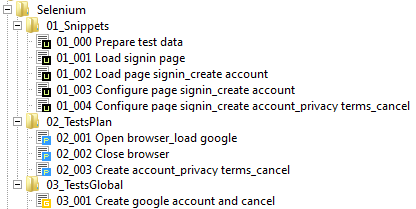
- identify the number of pages displayed to script (and the possible reuse of these pages)
- identify the different sequence of pages to create the scenarios
- identify user paths
To perform this type of test, you must declare the agent that will be used

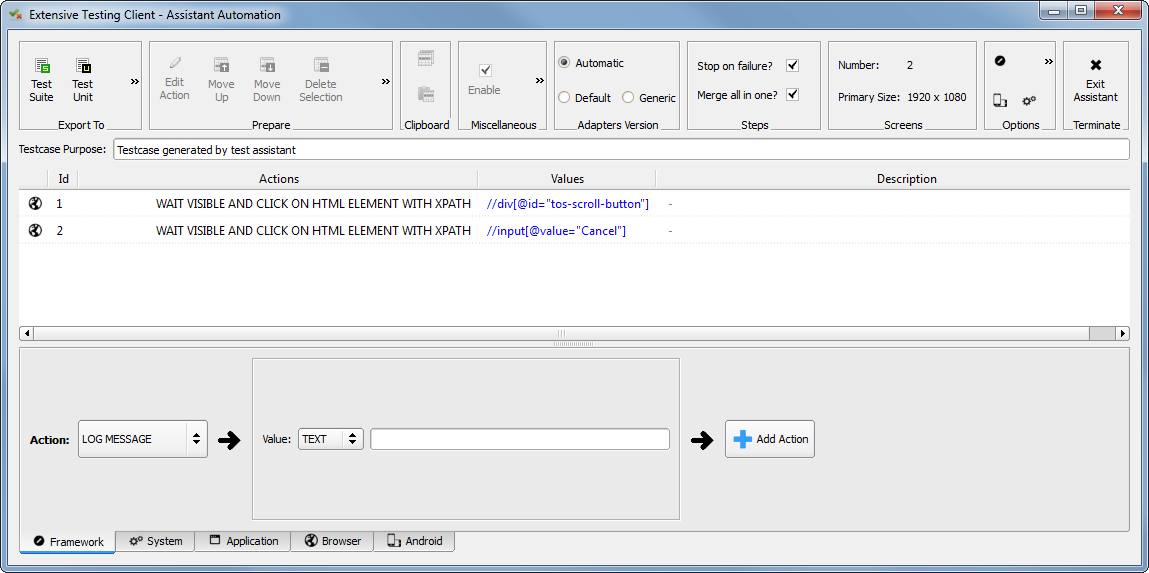
The writing of the tests is done through the assistant. It allows to describe the different stages and generate the equivalent unit test. The sequence of pages are to be described in the flat tests. The user path is to be defined in a global test.
The solution also recommends using only xpath to identify HTML elements.
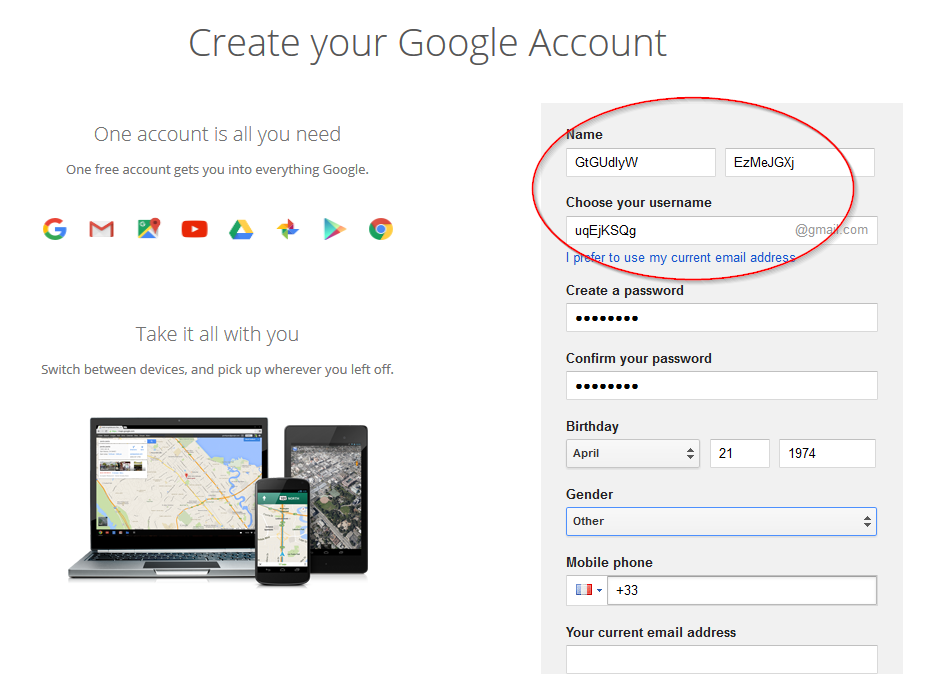
The example below shows how to create a Google Account using a random name and first name.
Example of result:
Tip
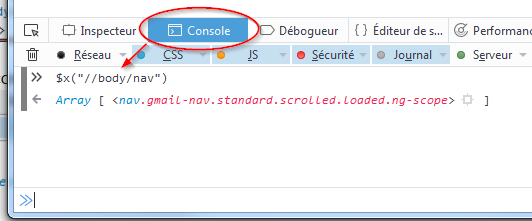
It is possible to use browser development tools to validate xpaths.
Note
The example presented below is available in full in the test samples /Samples/Tests_Gui/Selenium/.
Note
Selenium3 requires at least Java 8 on the client machine.
| Browsers | Version Selenium | Gecko |
| Firefox <47 | Selenium 2 | Non |
| Firefox > 47 | Selenium 3 | Oui |
| IE | Selenium 3 | N/A |
| Chrome | Selenium 3 | N/A |
Android mobile
- To write the test of a mobile application, you must:
- Have an Android mobile phone connected in USB on a PC
- Deploy an adb agent on a computer with an android mobile connected to it.
- Have access to the xml description of applications from the agent
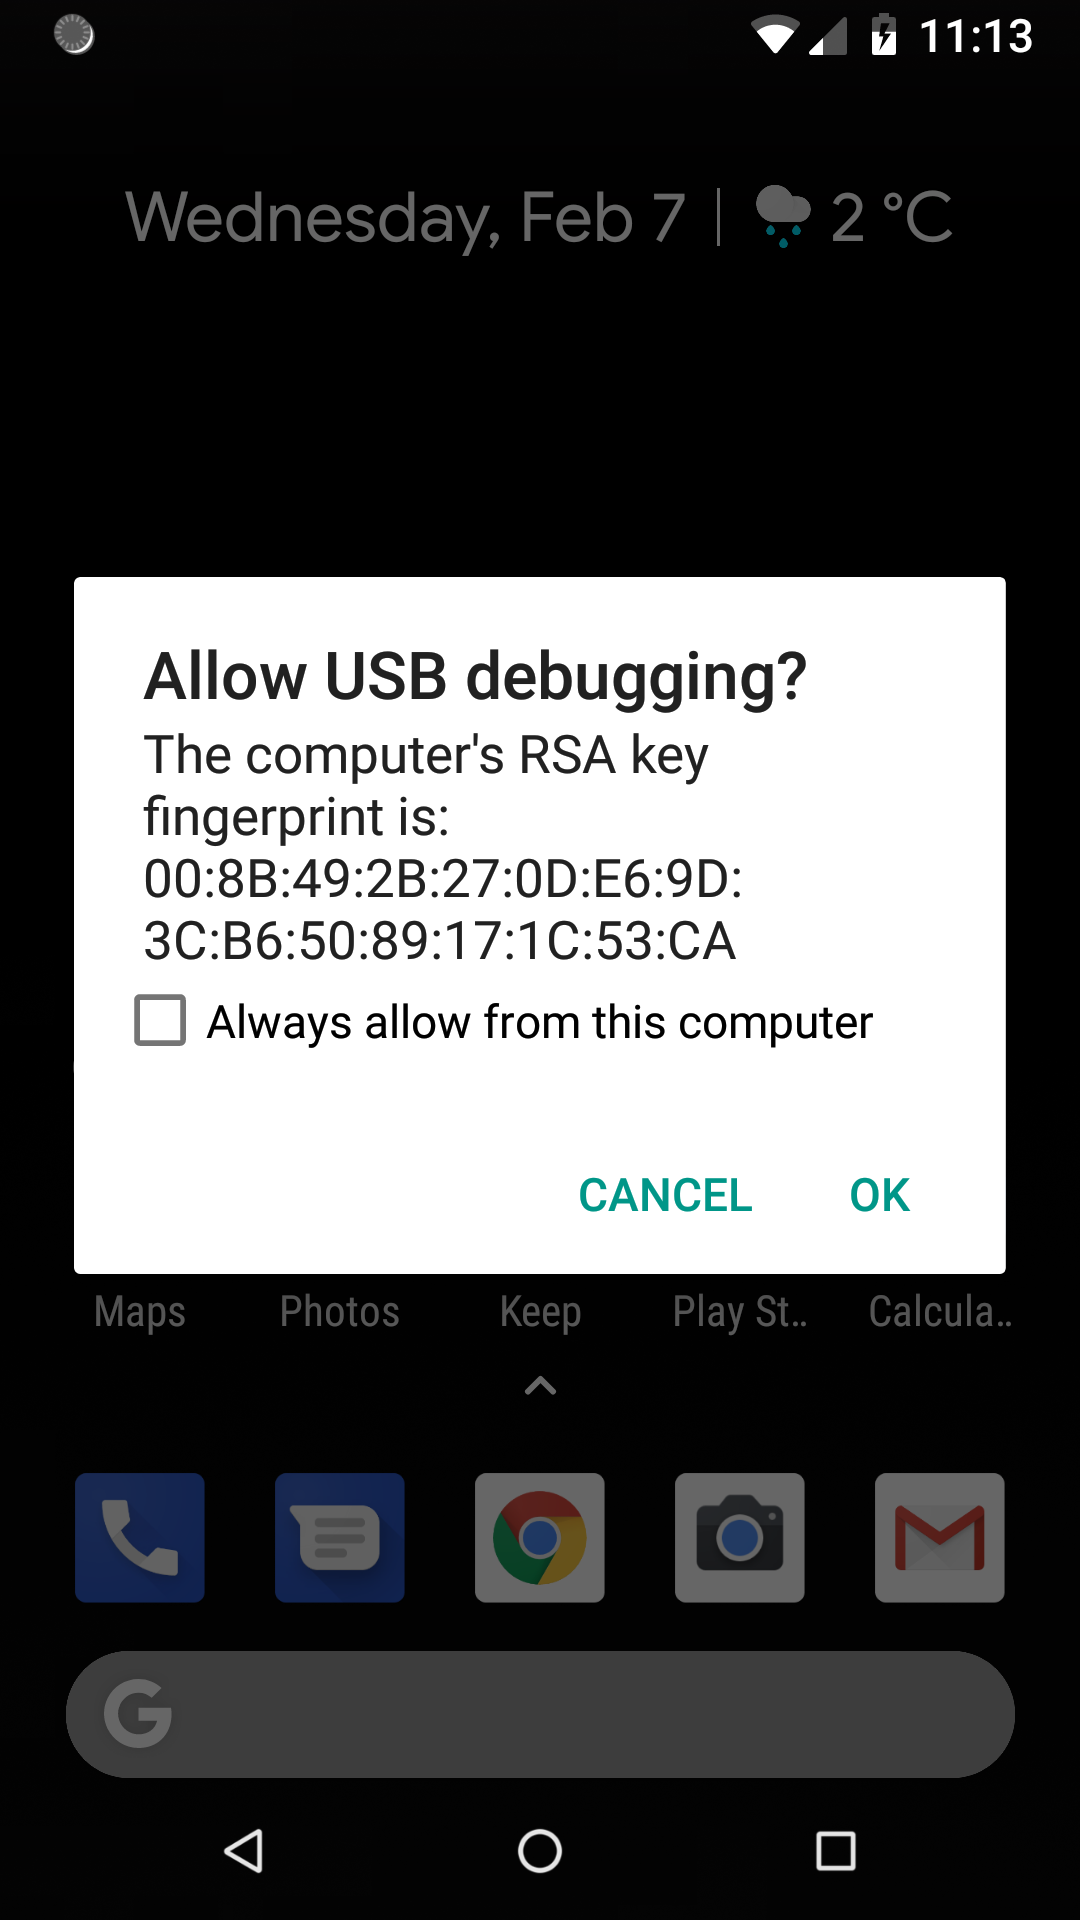
Connecting the adb agent on the android mobile requires accepting the RSA key.
After login, the agent displays a preview of the screen on the pc, it is possible to browse the interface from the agent and have the XML elements available in the page.
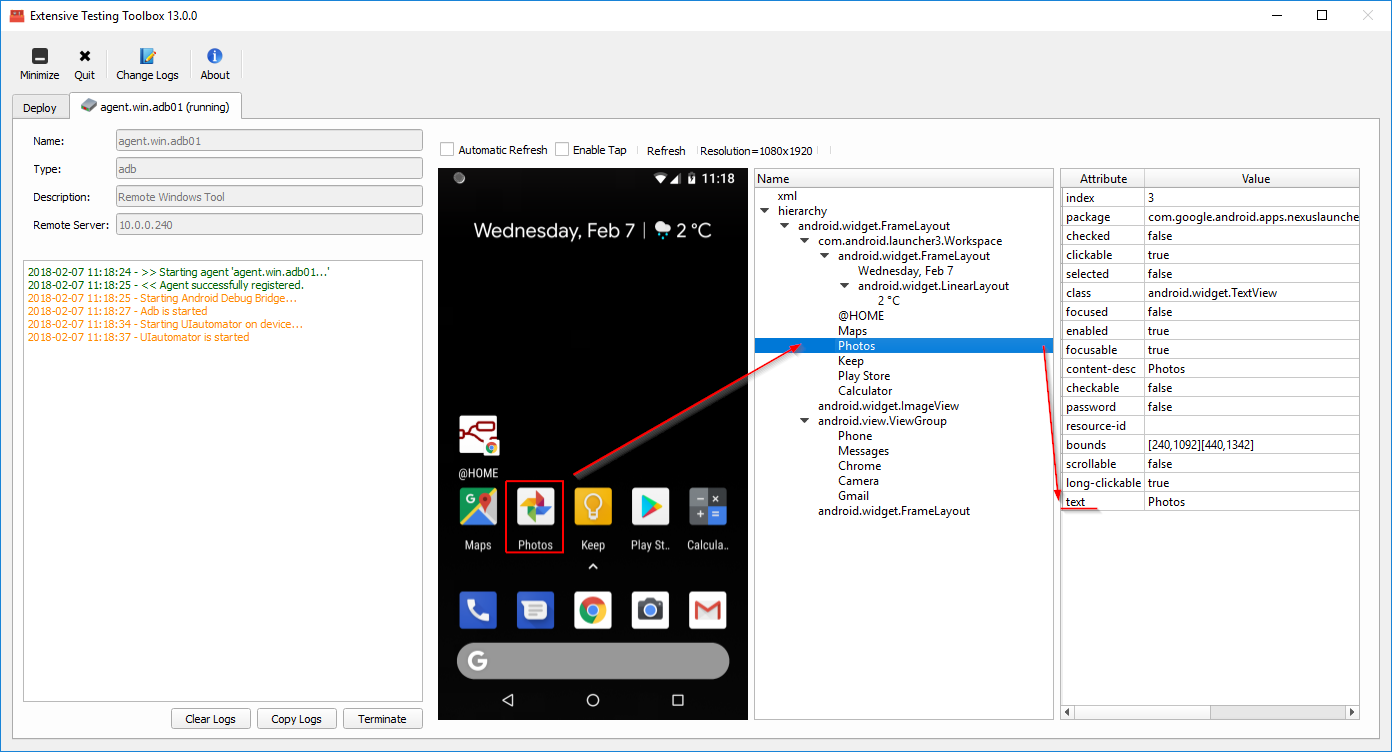
The writing of the tests is done with the assistant. It allows to describe the different stages and generate the equivalent unit test. It is essential to rely on the adb agent for have the list of available XML elements and attributes.
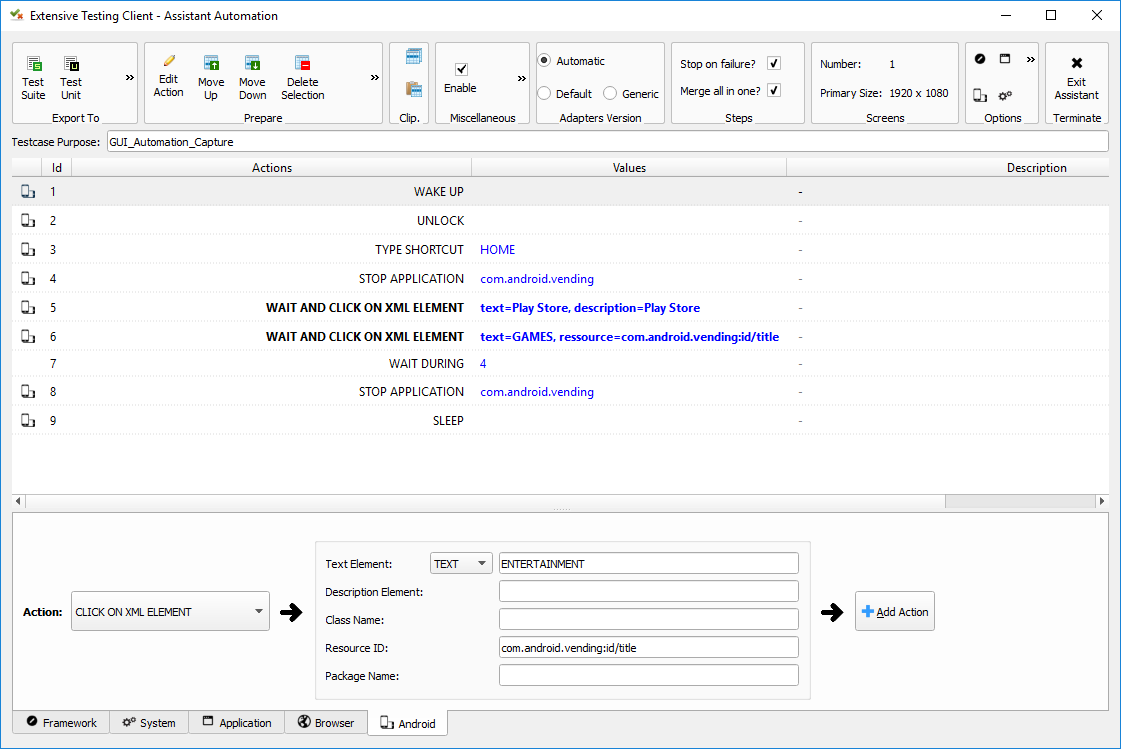
Note
The complete example is available in test samples /Samples/Tests_Mobiles/03_PlayStore.tux.
Important
Enabling USB debug mode is required on the phone.